Make ScanNCut sticker cut lines as SVG
Draw a white border and cut line at the width you want, then download an SVG with the artwork and cut line separated. Lay out several stickers at the same size on one sheet.

Drag your PNG or JPG image hereChoose your PNG or JPG image
PNG, JPG & WebP · Brother ScanNCut preset · SVG with separate artwork and cut line
- Your files are never uploaded Cut lines and files are made right in your browser
- Every feature is free
Done in 3 steps
Upload art & set the border
Add a PNG or JPG and the white border and cut line appear automatically. Set the cut shape, border width, and print size.
Download with the ScanNCut preset
The download window opens on the Brother ScanNCut preset: an SVG with the artwork (Artwork) and the cut line (CutContour) in separate groups.
Import into CanvasWorkspace
Open the SVG in CanvasWorkspace, check the cut line, and send it to your machine. Menu names can vary by model and version.
White border and cut line,
drawn in one go
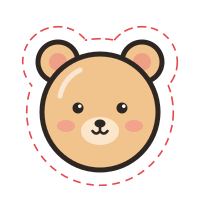
We trace your artwork, add a white border, and mark the cut line just outside it. Print shops and cutting machines follow that line to cut your stickers.
- White border — protects your artwork
- Cut line — where the blade goes

Frequently asked questions
What people ask most when making stickers with a Brother ScanNCut.

What’s inside the SVG?
Your artwork at print size (the Artwork group) and a closed cut path with a stroke and no fill (the CutContour group). The size is set in millimeters, so you can check the real size after importing.
Can’t I just use the ScanNCut scanner?
You can cut around a scanned outline. But to set the white border in millimeters, lay out many stickers at the same size, or also make a print shop PDF, a ready-made cut file is easier.
How wide should the white border be?
About 2 mm is a good start. A wider border keeps a slightly shifted cut from clipping the art. For art with narrow gaps, turn on Corner smoothing and Fill small holes.
Can I also make a file for a print shop?
Yes. With the same cut line, choose PDF (Print shop default) in the download window to get a print-ready file with the cut line on its own layer.
Sticker making guides
Step-by-step help for Cricut, Silhouette, and cut line files.